

Line Item Set Up
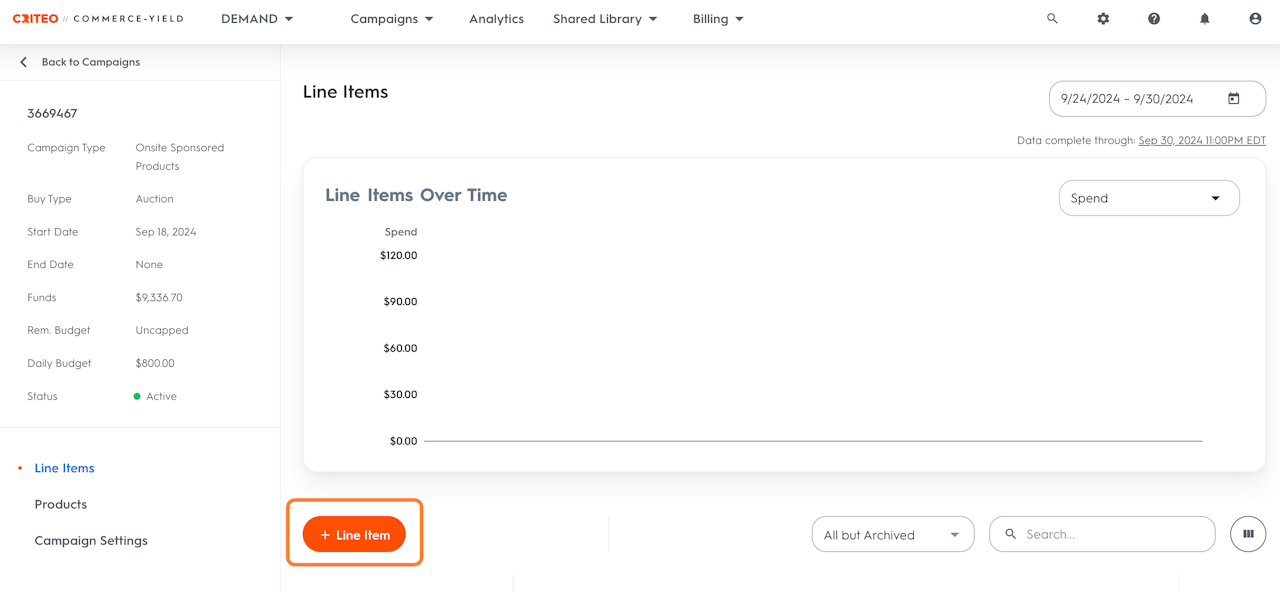
To access the creation of a line item, either you've just completed the creation of a campaign and you will automatically be redirected to the creation of your first line item, or follow the steps below:
Go to the Campaigns section
Find the desired campaign to add a line item to and click the campaign name
This opens the campaign page where all line items appear. Add new ones here.
Click the + Line Item call-to-action on the top left side
Choose between the following options:
Set up one line item at a time: Set up retailer-specific line items individually.
I’ll set them up later: Come back and create the line items later; only the campaign shell will be created.

Line Item Settings
Naming the Line Item
The first step is to name the Line Item. The chosen Line Item name will be seen only by the user in the Campaigns page and Analytics sections. It won't appear in the ads and will never be visible to shoppers.
Enter a name that will help identify it within the campaign or in a report. A Line Item name is unique and each Line Item must be named differently in the same campaign.
Bid Strategy
In this step, you’ll choose your preferred bidding strategy. We offer Standard or Adaptive CPC optimization. Your choice in this step will impact what fields you see in Step 4: Bid.
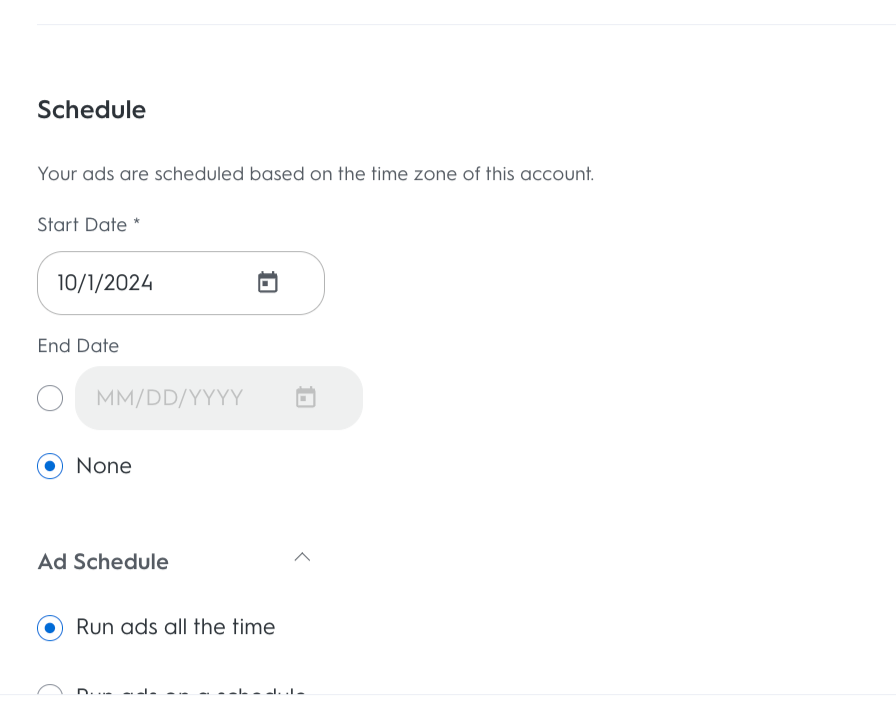
Setting Start and End Dates
Start by selecting the Start Date on the calendar (today's date is set by default but any date in the future can be selected).
Continue by selecting an End Date. Choose from the following two options:
No End Date: This is the None option. The line item will be on “Active” status for as long as it has funds to spend.
Specific End Date: Select the date directly on the calendar. The line item will stop serving ads and change to Ended status on this precise date at the end of the day.
