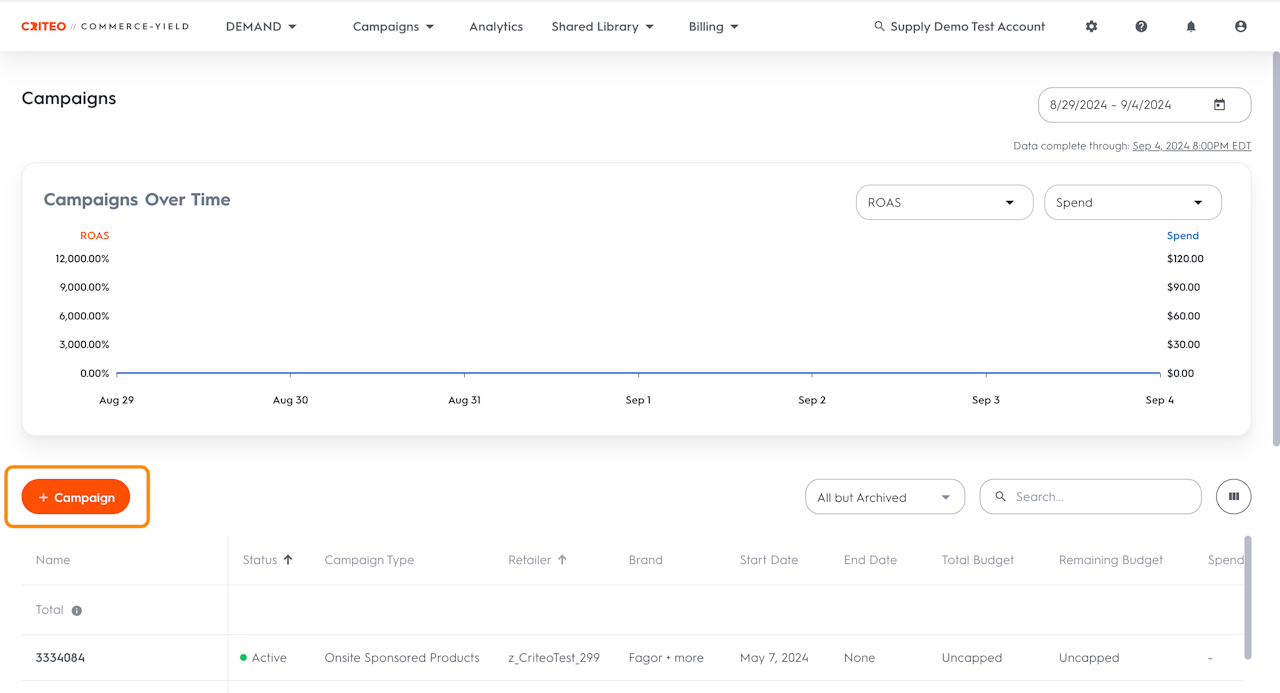
Create a Campaign
To create a campaign, navigate to the Campaigns section of the platform and follow the steps below:
Click +Campaign call-to-action on the top left side of the Campaign Section landing page.
Choose between Onsite Display and Onsite Sponsored Products.
Choose between Preferred Deals (for Onsite Display)/ Auction (for Onsite Sponsored Products) or Sponsorships (available for both).
Name the campaign and define the Flight Dates
Define the Budget.
Set up the Attribution Settings.
Click Create: The campaign is ready, and you can now add Line Items.
After setting up the campaign, it automatically redirects to our Line Item creation step.
Campaign Settings
Campaign Name
Name the campaign during your campaign creation.
The chosen campaign name will be seen only by you in the Campaign and Analytics Section. It won't appear in the ads and will never be visible to shoppers.
Campaign Budget
Setting up a budget for the campaign is optional. When creating the campaign, select either one of the options below:
Uncapped Budget: The campaign will spend from the funds available in the balance that you set up in the Billing Section of the platform.
Capped Budget: The campaign will stop running when the budget entered is reached. Set up a budget at the campaign level.
You have the option to set a monthly or daily cap. If the cap is set at the campaign level, the campaign will stop spending once the line items under that campaign reach the amount specified in the cap.
Monthly Cap:
The campaign will spend until the amount set at this level has been reached by all line items for the entirety of the month.
Daily Cap:
Campaign will spend until the amount set at this level has been reached for all line items in one day.
Automatic Daily Budget is available at the campaign daily budget level, exactly like the line item level:
This tool divides the budget evenly across all days in the campaign, and will automatically take any underspend and divide it evenly across the remaining days of the campaign.
To enable this option, 3 fields will be required:
Campaign Start Date
Campaign End Date
Campaign Total Budget
Campaign Attribution Settings
The conversion cycle can be drastically different between a shopper buying groceries and a shopper buying a TV. Your return on ad spend (ROAS) measurement can also be different depending on the objectives (lower or upper funnel) and the ad formats that are running.
Customize the attribution settings to fit the campaign's goal by selecting which Lookback Window to use and defining the Product Match for both Post-Click and Post-View conversions.
The Lookback Window is the eligible time period between a sales transaction and an ad event. The Product Match is the relationship between the purchased product and the advertised one.
The following Lookback Window options are available to choose from:
Post-Click Settings
Lookback Window:
7 Days
14 Days
30 Days
Product Match:
Same product
Same product, same category
Same product, same category, same brand
Post-View Settings
Lookback Window options:
No Post-View
1 Day
7 Days
14 Days
30 Days
Product Match options:
Same product
Same product, same category
Same product, same category, same brand
By default, the following Attribution Settings will be used unless edited:
Post-Click: 30 Days, Same Product + Same Category
Post-View: 1 Day, Same Product
In the beginning, we recommend setting up an attribution window that you’re used to, in order to compare apples to apples. Then, as you turn on more campaigns, you can consider changing your model to see the impact of those changes.
Change the attribution settings after creating your campaign and launching your line items.
To learn more about our attribution settings and model, go to Attribution Settings.
For additional support, here is a video showing how to build a campaign.
